This week I celebrated a big birthday. 40. Yep, it’s official, I’m in the 40 Club. I have a number of very good friends who are not far behind so they’ve named me team captain. I’m not afraid though…bring it!
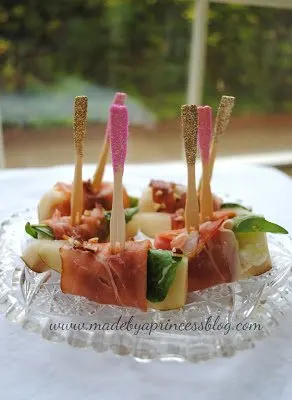
Last Saturday my husband threw me a wine and cheese party with a few close friends to celebrate and because I am such a control freak (sorry honey) I just had to make a few things. This picture is actually a recreation because they were snatched up so quickly I couldn’t get a picture! I think Dr. Jim ate half the plate. While I don’t have his official endorsement I’m going to take that as a stamp of approval…doctor approved!
This is what you need:
Pears
Goat cheese
Fresh basil leaves
Prosciutto
Honey
Sea salt
Pecan bits (you can use any nut though)
Toothpicks
Prep:
Wash your basil leaves and let dry completely. Open your package of prosciutto and cut right across, making shorter strips. Once your basil has dried pull a bunch of leaves off the stems and set aside.
I did not take the skin off of the pears because: a) I was lazy and/or b) I felt they would hold up better and not get mushy. Let’s go with b). Cut your pears into slices but not too thin. Carefully cut the back of the slice to create a flat surface…this makes plating much easier and looks nicer than a bunch of wobbly pears.
Spread goat cheese along one side of the pear and place your basil leaf on the slice. Wrap prosciutto around the pear slice and use your toothpick to hold together. Set all of your slices on a prep plate until they’re all done.
Once you have all the pear slices you need drizzle honey across the top. Don’t load up on honey or you’re guests will have a sticky mess to deal with, just lightly drizzle. Sprinkle sea salt and then your nut bits on top. Now take all of your yummy pear, goat cheese, prosciutto bites and place them on a nice tray.
The toothpicks in the picture were made by me. My party was pink and gold so *of course* I had to make toothpicks that matched. I’m not crazy…but then again my mother never had me tested… You can make your own though with a little Modge Podge and glitter.
Enjoy!

